- Mapping with ArcGIS Pro
- Amy Rock Ryan Malhoski
- 478字
- 2021-06-24 18:39:08
Working with map frames
Notice that in the Layout View, the maps overlap with no sense of priority. The Counties map appears in the center of the layout, and the North America locator is pinned to the lower-left corner. For now, let's rename the map frames for clarity:
- Select the Counties map by clicking on it (make sure you have not locked your map frames):
When an item in the layout is selected, you'll see boxes at the corners and midpoints. These boxes (called handles) allow you to resize the frame. Clicking the frame between the handles allows you to move it. Click anywhere outside the frame to deselect it.
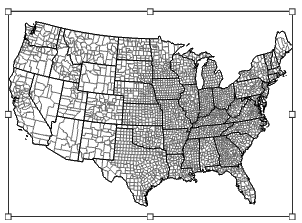
Figure 2.19: A selected item in the layout
- Using the same technique we used for the map layers, rename your US Counties map frame to US Counties.
- Repeat this process for the North America map frame and name it Locator Map.
Also, notice how both maps are drawn with a black line around them. By default, ArcPro draws a neatline around your map frames. - Switch to the Map Frame tab, which has now appeared on the ribbon, to access formatting choices for this frame. In the Current Selection drop-down menu at the top-left corner, select Border. Remove the neatline by selecting No Color in the Line drop-down:
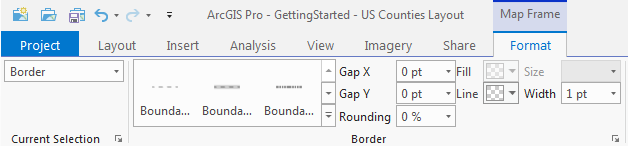
Figure 2.20: The Map Frame tab allows you to change the outline, fill, and drop shadow properties for the data frame
- To keep the Locator Map from looking like islands off the coast of the US, we'll leave the border on it, but change it to a medium gray. Repeat the preceding steps and select gray 50% as the line color.
Locator maps are an important map element when you need to place your data in larger geographical context to help your map reader understand the scope or location of the map. While important, this is still secondary or tertiary information, so locator maps should be small and tucked away from the visual center in a way that works with the overall balance of the map.
Let's resize and reposition this data frame:
- Select the Locator Map. Verify that the Map Frame is unlocked.
- Make sure the Current Selection is set to Map Frame. Set the Size and Position at the right end of the ribbon. Make the Width 2.5 in and the Height 2 in. Press Enter or click in another field to register your changes:
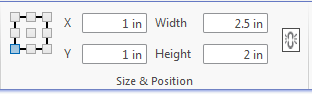
Figure 2.21: In addition to specifying the data frame dimensions, you can place it in a specific location on the page
- Let's tuck the Locator Map in the lower left-hand corner of the layout, for balance. Drag the frame to the corner and leave a gap between the Map Frame and the print margins (faint gray lines). Try to make the gaps at the left and at the bottom the same size.
推薦閱讀
- Learning Neo4j
- Python快樂編程:人工智能深度學習基礎
- 算法零基礎一本通(Python版)
- Azure IoT Development Cookbook
- Android Studio Essentials
- 深入理解Django:框架內幕與實現原理
- Machine Learning with R Cookbook(Second Edition)
- MATLAB定量決策五大類問題
- 深入RabbitMQ
- Test-Driven Machine Learning
- 代替VBA!用Python輕松實現Excel編程
- Vue.js光速入門及企業項目開發實戰
- 大數據時代的企業升級之道(全3冊)
- 軟件測試技術
- Mastering Bootstrap 4