- Mastering JBoss Enterprise Application Platform 7
- Francesco Marchioni Luigi Fugaro
- 1106字
- 2021-07-14 10:07:45
Basic operations
The first thing you may want to know is what version of JBoss EAP is running and which JVM it's using; to gather this information you can rely on the version command, whose result is as follows:
[standalone@localhost:9990 /] version
JBoss Admin Command-line Interface
JBOSS_HOME: /opt/rh/jboss-eap-7.0
JBoss AS release: 2.1.2.Final-redhat-1 "Kenny"
JBoss AS product: JBoss EAP 7.0.0.GA
JAVA_HOME: null
java.version: 1.8.0_65
java.vm.vendor: Oracle Corporation
java.vm.version: 25.65-b01
os.name: Linux
os.version: 4.2.5-300.fc23.x86_64
[standalone@localhost:9990 /]
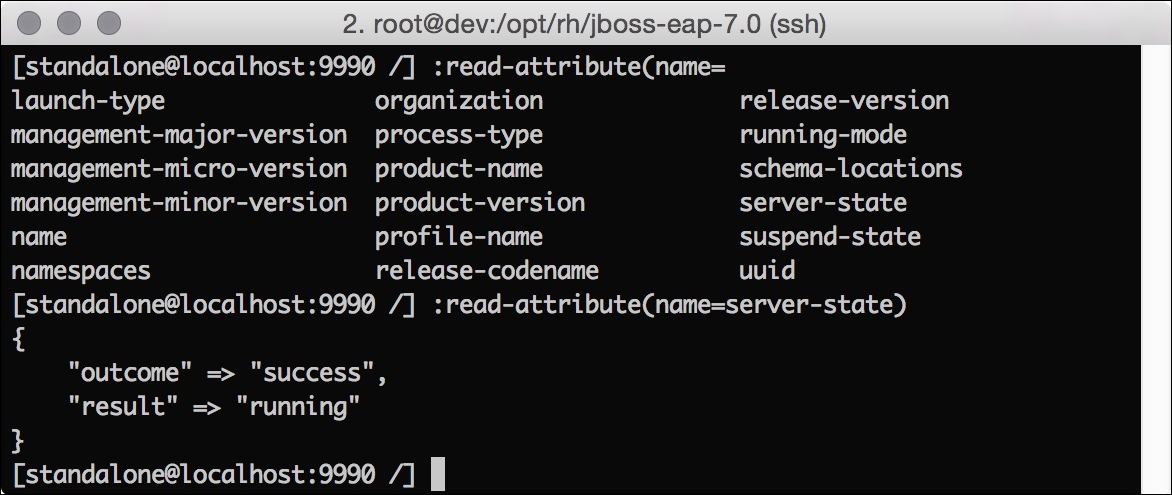
Furthermore, to know the exact state of a JBoss instance, you need to rely on the read-attribute method followed by the attribute name, as follows:
As mentioned previously in this chapter, method invocations are bound to resources by the colon (:) symbol. In this case, the resource is the root, that is, the server. To know where you are, just use the pwd command, as follows:
[standalone@localhost:9990 /] pwd
/
[standalone@localhost:9990 /]
Just to get you a better idea, see the following example:
[standalone@localhost:9990 /] cd subsystem=datasources/data-source
[standalone@localhost:9990 data-source] pwd
/subsystem=datasources/data-source
[standalone@localhost:9990 data-source]
Managing server state
A JBoss EAP instance, as you have read in the first chapter, can be stopped and restarted by invoking the shutdown command (to restart, you need to append the --restart=true directive to the command).
Nonetheless, there is one more command that might be helpful, which is reload.
The reload command stops and starts the JVM, without creating a new one; thus the process ID (also the PID) of the EAP instance remains the same - this is particularly handy for monitoring tools that might bind particular metrics to PIDs.
Let me show you an example. First let's grab the PID of our EAP, as follows:
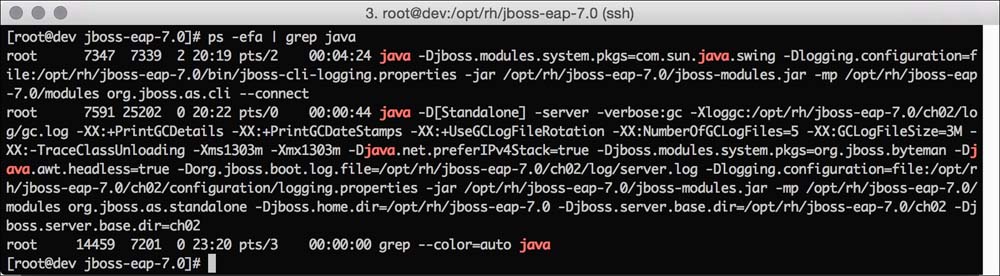
The PID is 7591. Now let's get into the CLI and reload the server instance, as follows:
[standalone@localhost:9990 /] reload
[standalone@localhost:9990 /]
If you now check the PID again, as we did before, you should find the same PID associated with the JBoss EAP instance.
On the other hand, a restart will stop and destroy the current JVM and create a new JVM process with a new PID. Let's try it, as follows:
[standalone@localhost:9990 /] shutdown --restart=true
[standalone@localhost:9990 /]
Now check the PID, as follows:
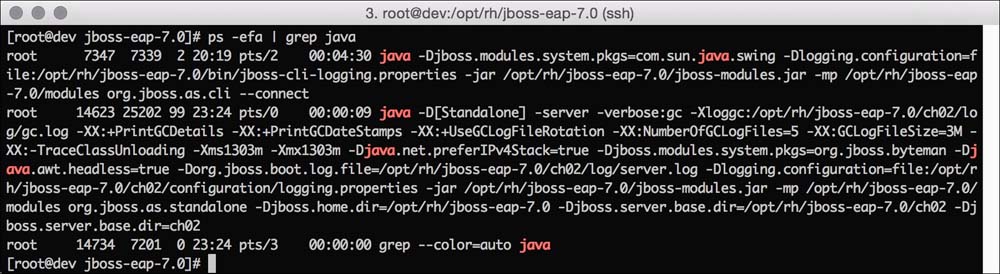
As you can see, we have a different PID (for me, it is 14623 - obviously you may have a different one).
Deploying and undeploying an application using CLI
We will now take a look at how to deploy and undeploy an application using the CLI. It will be just a brief introduction as we will have a dedicated chapter later on in the book.
One of the main tasks you want to do with your application server is deploy an application. Without going further, let's grab the JBoss EAP quickstarts. The quickstarts are a set of projects to show you and explain how to use most of the Java EE specification to run inside JBoss EAP.
Open a browser of your choice and point to the following URL: http://www.jboss.org/products/eap/download/.The previous link connects you to a page where you can download the JBoss EAP 7 installer, its Maven repository, and its quickstarts - while writing this book the available version was 7.0.0.GA; the final version is expected some day around spring or summer 2016.
Download the quickstart bundle and open the archive in a folder of your choice. For convenience, we will refer to that folder as $JBOSS_QUICKSTARTS.
Let's start by deploying the helloworld project. To build the project, do as follows:
cd $JBOSS_QUICKSTARTS
cd helloworld
mvn clean package
This will create a WAR bundle in the target folder of the helloworld project. Now we are ready to deploy the application.
Get into the CLI and execute the deploy command followed by the bundle's name, as follows:
[standalone@localhost:9990 /] deploy target/jboss-helloworld.war
[standalone@localhost:9990 /]
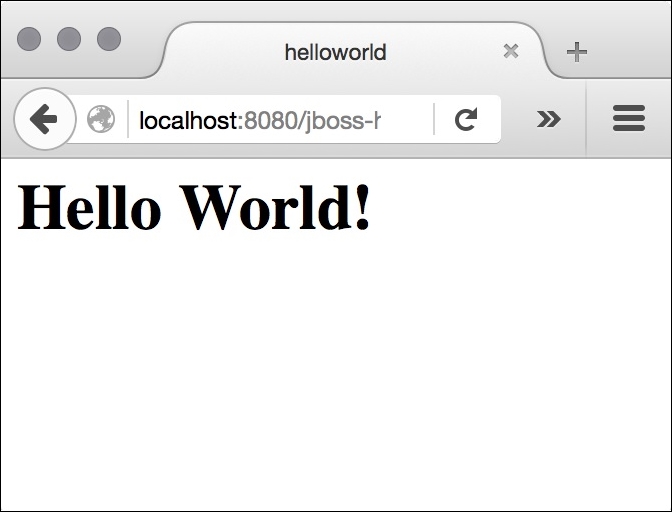
Let's check the application by opening the browser and pointing it to the following URL: http://localhost:8080/jboss-helloworld.
You should land on a page similar to the one depicted as follows:
To undeploy the application, you can rely on the undeploy command followed by the runtime name of the application, as shown in the screenshot here:

If you now go back to the browser and refresh the page, you will no longer see the helloworld main page.
Creating a configuration snapshot
Often times, you are required to change your configuration, and when you are dealing with production environments, you surely need to take a backup of what is about to be updated. Configuration needs a backup as well. Despite the JBoss EAP configuration being based on just one or two files, there is a handy command to take a snapshot of your current configuration; that is take-snapshot.
Nonetheless, the application server on its own already backs up three temporally different configurations for you:
- initial - The initial configuration provided by the application folder is saved in the file named
standalone.initial.xml - boot - The last configuration that successfully booted the application server is saved in the file named
standalone.boot.xml - last - The last configuration that was committed by the application server itself is saved in a file named
standalone.last.xml
All these files are saved in the standalone_xml_history folder, placed under jboss.server.config.dir (described in Chapter 1, Installation and Configuration).
The same criteria apply when running the domain mode, except that you will have a folder named domain_xml_history (containing the initial, boot, and last files of the domain.xml) and a folder named host_xml_history (containing the initial, boot, and last files of the host.xml).
Let's now start a standalone JBoss instance and take a snapshot via CLI, as follows:
$JBOSS_HOME/bin/jboss-cli.sh
You are disconnected at the moment. Type connect to connect to the server or help for the list of supported commands:
[disconnected /] connect
[standalone@localhost:9990 /] :take-snapshot()
{
 "outcome" => "success",
 "result" => "standalone/configuration/standalone_xml_history/snapshot/ 20160110-041508107standalone.xml"
}
[standalone@localhost:9990 /]
As you can see from the preceding code, taking a snapshot of the configuration is very easy. Furthermore, you should have noticed that the configuration is saved in an additional folder named snapshot, under the usual standalone_xml_history folder. Also, the file configuration file is named by prefixing the timestamp of the date when invoking the command, then appending the standalone.xml string. This way, you can easily order and recognize the file that has the configuration you took the snapshot for.
Note
The timestamp notation used to name a snapshot has the following format: yyyyMMdd-HHmmsssss.
The format should be read as follows:
yyyy - four digits for the year
MM - two digits for the month
dd - two digits for the day
- (the minus sign) - to separate date and time
HH - two digits for the hours
mm - two digits for the minutes
ss - two digits for the seconds
sss - three digits for the milliseconds
- Apache Karaf Cookbook
- Cocos2d-x學習筆記:完全掌握Lua API與游戲項目開發 (未來書庫)
- Advanced Oracle PL/SQL Developer's Guide(Second Edition)
- 劍指Java:核心原理與應用實踐
- D3.js By Example
- Couchbase Essentials
- Visual Studio Code 權威指南
- Hacking Android
- 軟件測試技術
- 零基礎學SQL(升級版)
- Hadoop Blueprints
- 小學生C++趣味編程從入門到精通
- Windows 10 for Enterprise Administrators
- Game Development Patterns and Best Practices
- Slick2D Game Development