- Data Visualization with D3 4.x Cookbook(Second Edition)
- Nick Zhu
- 748字
- 2021-07-09 19:26:23
Asynchronous data loading using queue
In this recipe, we will demonstrate another very useful technique commonly used to process or generate data in large data visualization projects. It is usually necessary in complex visualization project to load and merge multiple datasets from different sources before proceeding to visualizing. The challenge in this kind of asynchronous loading is the difficulty in waiting to know when all datasets have been successfully loaded since only then the visualization can begin. D3 provides a very convenient queue interface to help organize these types of asynchronous tasks and helps you coordinate among them, which is the focus of this recipe.
Getting ready
Open your local copy of the following file in your web browser:
https://github.com/NickQiZhu/d3-cookbook-v2/blob/master/src/chapter3/queue.html .
How to do it...
In the code example of the queue.html file, we will simulate loading and merging multiple data points using the setTimeout function. The setTimeout function executes the given function after a set period of delay; in our case, we set the delay to 500 milliseconds:
<p id="chart"></p>

<script type="text/javascript">
    function render(data) {
        var bars = d3.select("#chart").selectAll("p.h-bar") // <-B
                .data(data);
        bars.enter().append("p") // <-C
                .attr("class", "h-bar")
                .style("width", function (d) {
                    return (d.number) + "px";
                })
                .append("span")
                .text(function (d) {
                    return d.number;
                });
    }
    function generateDatum(callback) {
        setInterval(function(){
            callback(null, {number: Math.ceil(Math.random() * 500)}); // <-D
        }, 500);
    }
    function load() { // <-E
        var q = d3.queue(); // <-F
        for (var i = 0; i < 10; i++)
            q.defer(generateDatum); // <-G
        q.awaitAll(function (error, data) { // <-H
            render(data); // <- I
        });
    }
</script>

<p class="control-group">
    <button onclick="load()">Generate Data Set</button>
</p>
This recipe generates the following output after clicking on the Generate Data Set button:
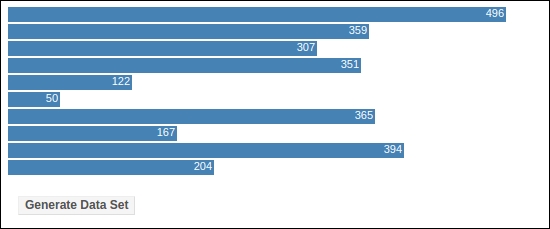
Asynchronous Data Generation using D3 Queue
How it works...
In this recipe, we have a pretty standard render function that generates horizontal bar visualization using the standard enter-update-exit pattern shown on lines B and C. This pattern by now should be very familiar to you. However, the data generation part, which is also our focus here, is a bit different in this recipe. On line D, we have a simple random datum generation function called generateDatum(callback), which receives a single parameter callback. This is a very standard template for task function in D3 queue interface, as shown in the following code snippet:
function generateDatum(callback) {
        setInterval(function(){
            callback(null, {number: Math.ceil(Math.random() * 500)}); // <-D
        }, 500);
}
In this function, we use the setInterval function to simulate asynchronous data generation with a 500 milliseconds delay. Each task function can perform arbitrary logic and calculation in its body, for example, loading data or computing results asynchronously. However, once the task is done, it has to invoke the callback function to notify the queue that it has finished its task and pass back the result as shown on line D. The callback function takes two parameters: error and result; in this case, we pass null as error signaling since it has completed successfully with the random number in second parameter. On line E, we have the load function defined that leverages d3.queue to execute the tasks. Let's take a closer look at the load function:
    function load() { // <-E
        var q = d3.queue(); // <-F
        for (var i = 0; i < 10; i++)
            q.defer(generateDatum); // <-G
            q.awaitAll(function (error, data) { // <-H
            render(data); // <- I
        });
    }
D3 Queue can be instantiated using the d3.queue function as shown on line F. Once created, it can register any number of tasks using the defer function as shown on line G. In our case, we used a for loop to register 10 asynchronous random datum generation tasks in our queue as shown on line G.
Note
D3 Queue does not provide multithreading internally as Web Worker offers. All tasks are handled synchronously; however, the task function can perform, and typically is designed to perform, asynchronous task as we demonstrated here. For more information on Web Worker, refer to https://developer.mozilla.org/en-US/docs/Web/API/Web_Workers_API/Using_web_workers .
The d3.queue.awaitAll function shown on line H is used to wait for all tasks to be completed. This callback function passed to the awaitAll function will only be invoked once all tasks are completed or when an error occurs (only the first error is captured and passed to the callback). In our example, we have to wait till all the 10 random data points are successfully produced before calling the render function to generate the visualization on line I.
Tip
The d3.queue function also takes a parameter to define the maximum concurrency allowed when executing tasks. If not provided, it puts no limitation on concurrency.
In this chapter we covered the fundamental aspect of using D3 - binding data with the visual elements and how to keep them in synchronization. On top of that we have also covered various topics on data loading and manipulation. In next chapter we will introduce another fundamental concept in D3 to our readers - scales which powers many other higher level D3 features such as animation and shape generator for example.
- Java加密與解密的藝術(第2版)
- Effective Python Penetration Testing
- PHP+MySQL+Dreamweaver動態網站開發實例教程
- JavaScript入門經典
- Unreal Engine 4 Shaders and Effects Cookbook
- Mastering JBoss Enterprise Application Platform 7
- Service Mesh實戰:基于Linkerd和Kubernetes的微服務實踐
- 零基礎學Kotlin之Android項目開發實戰
- Spring+Spring MVC+MyBatis從零開始學
- Advanced Python Programming
- Apache Solr PHP Integration
- iOS開發項目化入門教程
- Java EE 8 and Angular
- Deep Learning for Natural Language Processing
- 從“1”開始3D編程