- PrestaShop Module Development
- Fabien Serny
- 433字
- 2021-08-05 17:12:28
Displaying comments
The last step will be to display comments filled in by customers on the front office, and we will also use the configuration values we created in the previous chapter. Let's begin by creating a method named assignProductTabContent, where we will retrieve the concerned id_product parameter (which is in the GET value):
$id_product = Tools::getValue('id_product');
Then make the SQL request to retrieve all comments concerning the products of the page you are on:
$comments = Db::getInstance()->executeS('SELECT * FROM '._DB_PREFIX_.'mymod_comment WHERE id_product = '.(int)$id_product);
Note
You should have noticed that I used the _DB_PREFIX_ constant, which corresponds to the prefix you chose when you installed your shop. In most cases, it will be equal to ps_. We didn't use it for the insert method since the insert and update methods automatically add the prefix.
Then retrieve the configuration values and assign all these variables to Smarty. You should end up with something like this:
public function assignProductTabContent()
{
  $enable_grades = Configuration::get('MYMOD_GRADES');
  $enable_comments = Configuration::get('MYMOD_COMMENTS');

  $id_product = Tools::getValue('id_product');
  $comments = Db::getInstance()->executeS('SELECT * FROM '._DB_PREFIX_.'mymod_comment WHERE id_product = '.(int)$id_product);
  $this->context->smarty->assign('enable_grades', $enable_grades);
  $this->context->smarty->assign('enable_comments', $enable_comments);
  $this->context->smarty->assign('comments', $comments);
}
public function hookDisplayProductTabContent($params)
{
  $this->processProductTabContent();
  $this->assignProductTabContent();
  return $this->display(__FILE__, 'displayProductTabContent.tpl');
}
Now, go to your displayProductTabContent.tpl template and add a foreach Smarty in your div markup, just below the h3 title, to display the comments:
<div class="rte">
  {foreach from=$comments item=comment}
    <p>
      <strong>Comment #{$comment.id_mymod_comment}:</strong> {$comment.comment}<br>
      <strong>Grade:</strong> {$comment.grade}/5<br>
    </p><br>
  {/foreach}
</div>
Note
If you're not familiar with the foreach Smarty, please read the official Smarty documentation at http://www.smarty.net/docsv2/en/language.function.foreach.
Now, go to your front office, and look at the result. You should see all the comments you had left about this product:
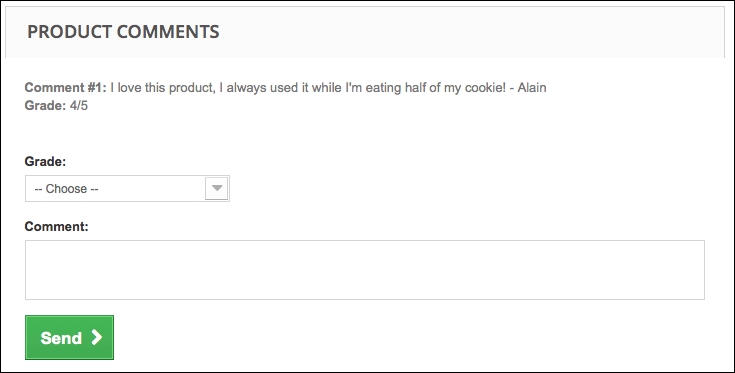
Even though it needs a lot of improvement (CSS, comment administration, and so on), you now have a fully working comments module now!
Maybe we could make one final upgrade on this chapter. We have assigned configuration values but we still don't use them. So, let's add Smarty conditions to display fields depending on the configuration:
{if $enable_grades eq 1}
  <div class="form-group">
    <label for="grade">Grade:</label>
    <div class="row">
      <div class="col-xs-4">
        <select id="grade" class="form-control" name="grade">
          [...]
        </select>
      </div>
    </div>
  </div>
{/if}
{if $enable_comments eq 1}
  <div class="form-group">
    <label for="comment">Comment:</label>
    <textarea name="comment" id="comment" class="form-control"></textarea>
  </div>
{/if}
And you might also add this condition around the form:
{if $enable_grades eq 1 OR $enable_comments eq 1}
{/if}
This way, if none of the fields are enabled, then the submit button won't appear.
Note
If you uninstall and reinstall your module (to register on a new hook, for example), do not forget to go to your module configuration page to enable the fields.
Congratulations! You have finished the developments on this chapter. The end of this chapter is more for your information, but you should definitely read it before moving on to the next chapter.