- Building Web Apps with Spring 5 and Angular
- Ajitesh Shukla
- 392字
- 2021-07-02 19:38:24
Installing/configuring the MySQL server
In this section, we will explain how to download, install, and configure the MySQL database and a related utility, MySQL Workbench. Note that MySQL Workbench is a unified visual tool which can be used by database architects, developers, and DBA for activities such as data modeling, SQL development, comprehensive administration tools for server configuration, user administration, and so on.
Follow the instructions given for installation and configuration of the MySQL server and workbench:
- Click on the Download link under MySQL Community Server (GPL) found as the first entry on the MySQL Community Downloads page. We shall be working with the Windows version of MySQL in the following instructions. However, one should be able to download and install MySQL on Linux using the installers provided on the page https://dev.mysql.com/doc/refman/5.7/en/linux-installation.html.
- Click on the Download button against the entry Windows (x86, 32-bit), MySQL Installer MSI. This would download an .exe file such as mysql-installer-community-5.7.16.0.exe.
- Double-click on the installer to start the installation.
- As you progress ahead after accepting the license terms and condition, you would find the interactive UI such as the one shown in the following screenshot. Choose the appropriate version of the MySQL server and also of MySQL Workbench, and click on Next.

Figure 1.6: Selecting and installing MySQL Server and MySQL Workbench
- Clicking on Execute would install the MySQL server and MySQL Workbench as shown in the following screenshot:
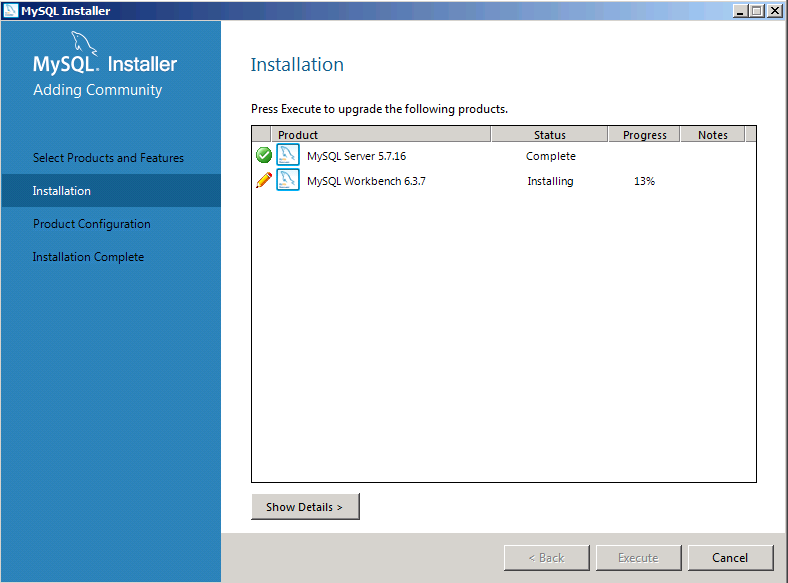
Figure 1.7: MySQL Server and Workbench installation in progress
- Once the installation is complete, the next few steps would require you to configure the MySQL database including setting the root password, adding one or more users, opting to start the MySQL server as a Windows service, and so on. The quickest way is to use the default instructions as much as possible, and finish the installation. Once all is done, you would see a UI such as the following:
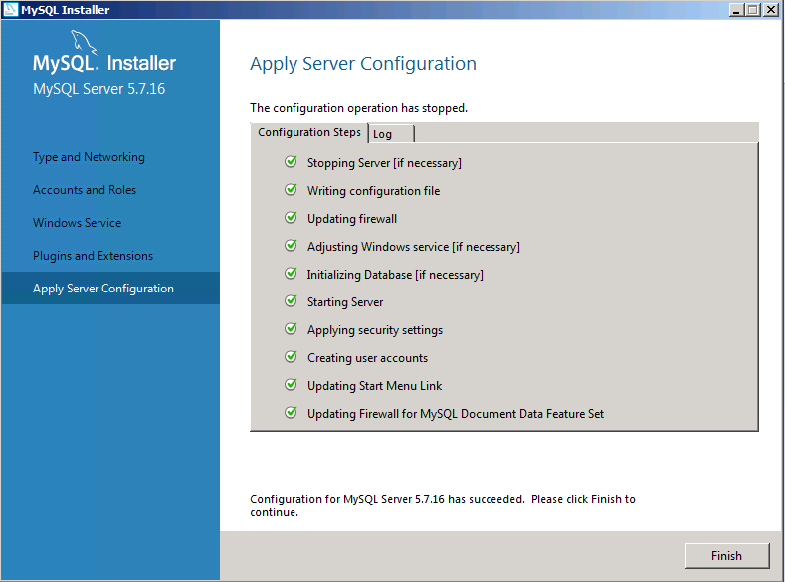
Figure 1.8: Completion of MySQL Server and Workbench installation
- Clicking on the Finish button will take you on to the next window, where you could choose to start MySQL Workbench. The following screenshot shows what the MySQL Workbench would look like after you click on the MySQL server instance on the Workbench homepage, enter the root password, and execute the Show databases command:
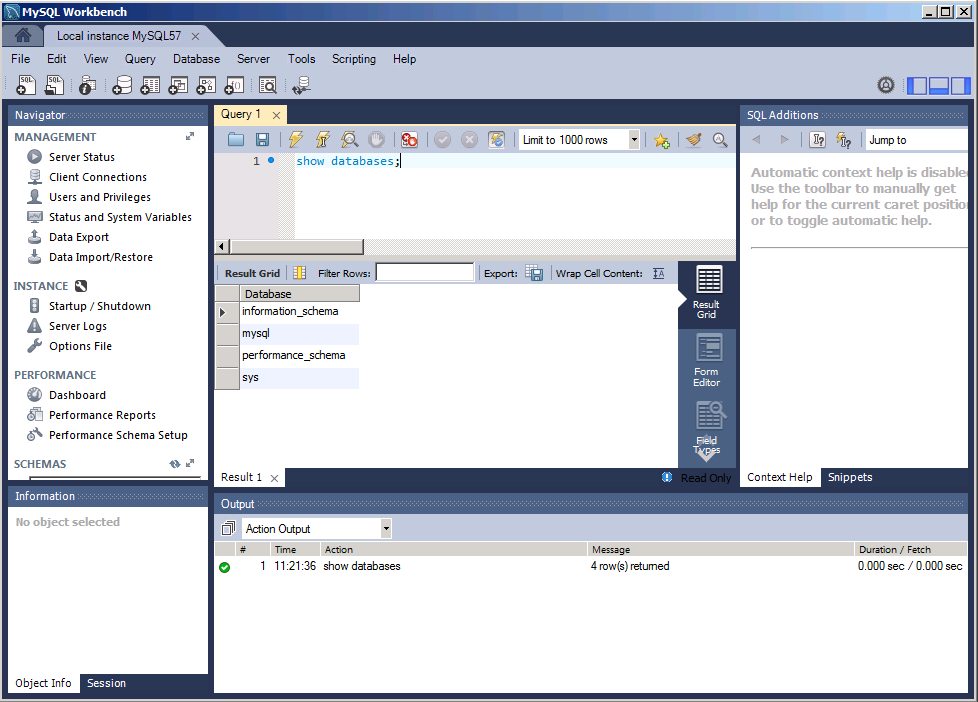
Figure 1.9: MySQL Workbench
推薦閱讀
- Python快樂編程:人工智能深度學習基礎
- Kibana Essentials
- Web Scraping with Python
- Python自動化運維快速入門
- Visual C++實例精通
- Cassandra Data Modeling and Analysis
- Flash CS6中文版應用教程(第三版)
- Swift語言實戰精講
- Mastering Android Game Development
- 軟件供應鏈安全:源代碼缺陷實例剖析
- SQL Server 2008 R2數據庫技術及應用(第3版)
- Unity Character Animation with Mecanim
- Python Web自動化測試設計與實現
- 軟件工程與UML案例解析(第三版)
- 軟件測試分析與實踐