- Hands-On Android UI Development
- Jason Morris
- 267字
- 2021-07-02 23:26:05
Creating SimpleLayout
Now that we've gone over the basics of an Android application structure, let's create a simple screen and see how things all fit together. We'll use Android Studio and one of its wonderful template activities. Just follow these easy steps:
- Start by opening Android Studio on your computer.
- Start a new project using the File menu, or the quickstart dialog (depending on which one shows up for you).
- Name the project as SimpleLayout, and leave any additional support (C++, Kotlin) off:

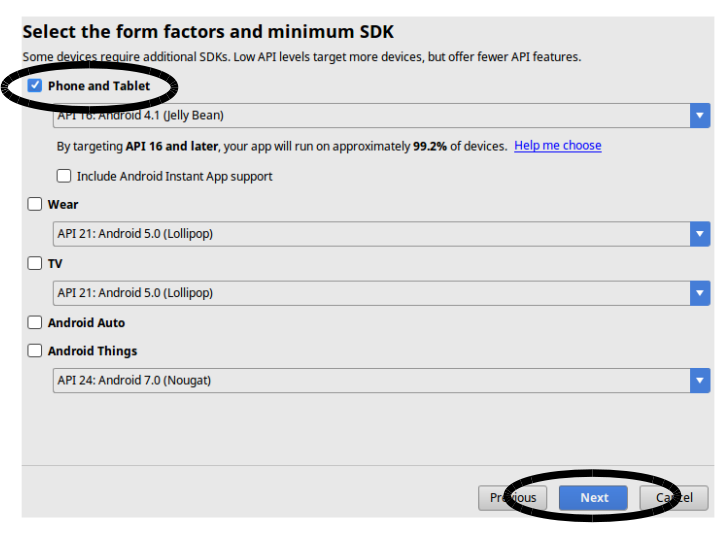
- On the next screen of the New Project wizard, ensure that you support Android 4.1 or higher, but leave only Phone and Tablet checked for this task:
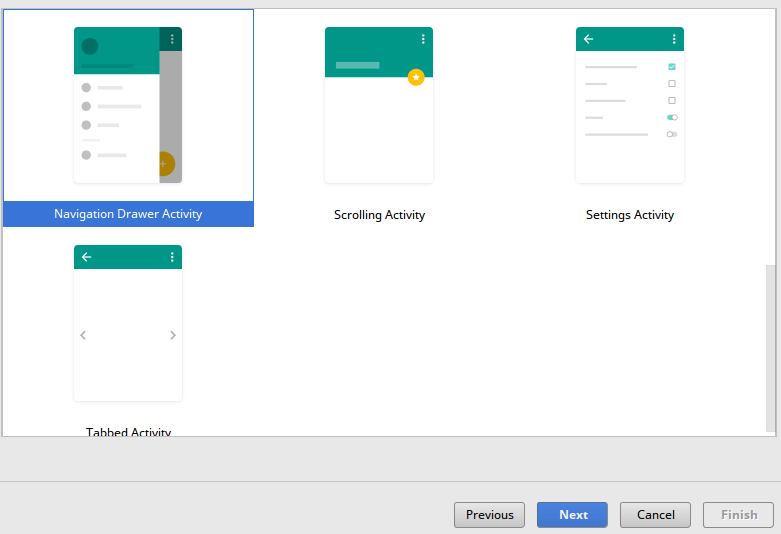
- Android Studio comes with a fantastic selection of Activity templates available on the next screen. This will be the first Activity generated to get you started with your project. For this example, you'll want to scroll down the list and find Navigation Drawer Activity. Select it and click on Next:
Leave the Activity details as their defaults (MainActivity, and so on) and click on Finish to complete the New Project wizard. Android Studio now creates your project and runs a first build-sync over to get everything working.
- Once your project has finished being generated, you'll be presented with the Android Studio layout editor, looking something like this:
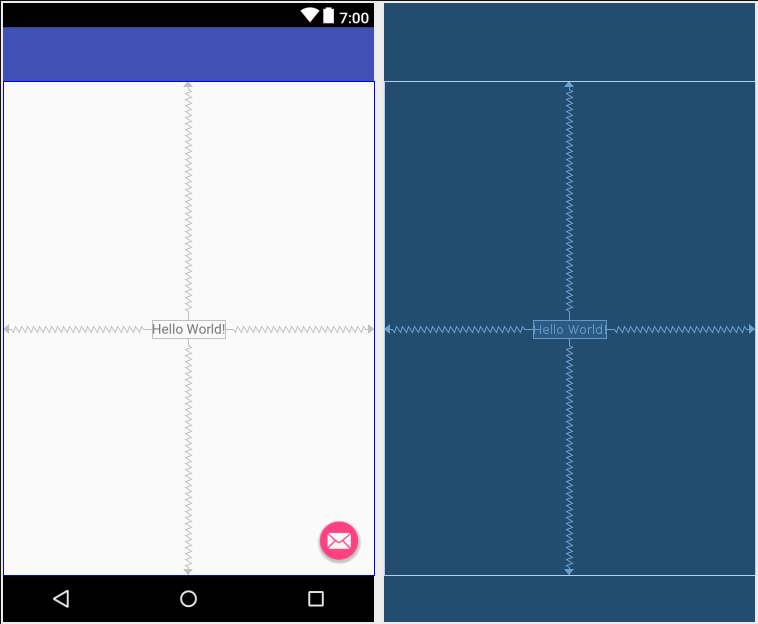
Congratulations, this template provides an excellent starting point to explore how Android applications and their user interfaces are built and fit together.
If you ever want to get back to the Activity templates screen, you can use the Gallery... option in the Android Studio File | New | Activity menu:

- 流量的秘密:Google Analytics網(wǎng)站分析與優(yōu)化技巧(第2版)
- 嵌入式軟件系統(tǒng)測試:基于形式化方法的自動(dòng)化測試解決方案
- Building Modern Web Applications Using Angular
- OpenShift開發(fā)指南(原書第2版)
- Learning ASP.NET Core 2.0
- Mastering Kali Linux for Web Penetration Testing
- C語言課程設(shè)計(jì)
- 微信小程序項(xiàng)目開發(fā)實(shí)戰(zhàn)
- 精通Python自動(dòng)化編程
- Android群英傳
- Scala編程(第5版)
- Instant Automapper
- Functional Python Programming
- Java EE基礎(chǔ)實(shí)用教程
- C/C++程序設(shè)計(jì)教程