- Hands-On Mobile Development with .NET Core
- Can Bilgin
- 470字
- 2021-06-24 13:55:32
Creating UWP applications
In a cross-platform and .NET Core context, UWP relies on the .NET Framework itself. However, the .NET Framework does implement .NET Standard and, as a result, the portable modules of cross-platform applications can be consumed by UWP applications. In other words, similar to the Xamarin implementation, shared (possibly platform-agnostic) application code can be extracted from UWP applications to leave only the native UI implementation as a UWP-specific module. In return, UWP projects can be included as part of any mobile development endeavour involving .NET Standard and/or Xamarin.
When implementing the native UI, developers have two inherently similar options; depending on the existing project architecture in a Xamarin project, they can create the UWP UI using the native XAML approach (that is, create the user interface within the platform-specific project and share only the business logic) or using Xamarin.Forms and reserving the platform-specific project only for platform dependencies.
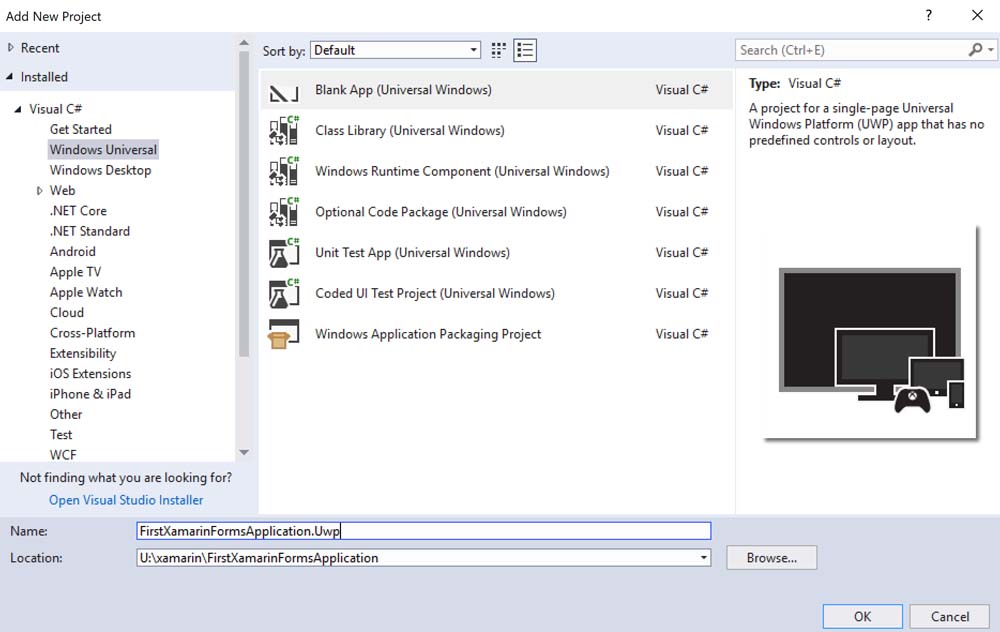
Using our previous Xamarin and Xamarin.Forms applications, we can add the UWP project so that we can deploy our application to Windows 10 devices:
Once the project is created, we can now reference the shared (or .NET standard) platform-agnostic project and reuse the business logic. For Xamarin.Forms, we can choose to include the forms project and bootstrap the Xamarin.Forms application. Bootstrapping the Xamarin.Forms application is as simple as installing the Xamarin.Forms NuGet package for UWP and loading the Xamarin.Forms application that was created previously.
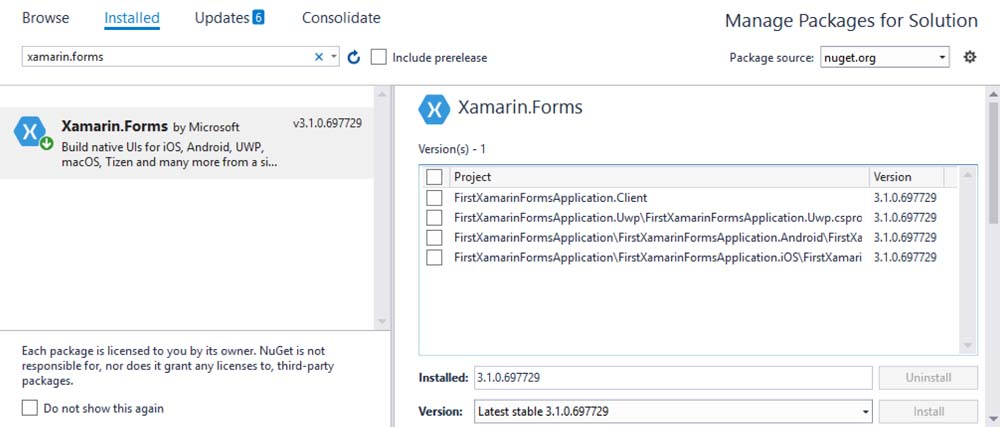
First, we install the Xamarin.Forms package and make sure that all the target platform projects have the same version installed:
Once the forms package is installed, we can now modify the MainPage.xaml file, as well as MainPage.xaml.cs. First, we will convert the MainPage view into a forms page:
<forms:WindowsPage
    x:Class="FirstXamarinFormsApplication.Uwp.MainPage"
    xmlns="http://schemas.microsoft.com/winfx/2006/xaml/presentation"
    xmlns:x="http://schemas.microsoft.com/winfx/2006/xaml"
    xmlns:d="http://schemas.microsoft.com/expression/blend/2008"
    xmlns:forms="using:Xamarin.Forms.Platform.UWP"
    xmlns:local="using:FirstXamarinFormsApplication.Uwp"
    xmlns:mc="http://schemas.openxmlformats.org/markup-compatibility/2006"
    Background="{ThemeResource ApplicationPageBackgroundThemeBrush}" mc:Ignorable="d">
    <Grid Background="{ThemeResource ApplicationPageBackgroundThemeBrush}" />
</forms:WindowsPage>
Then, we will load the Xamarin.Forms application:
public sealed partial class MainPage
{
    public MainPage()
    {
        this.InitializeComponent();
        LoadApplication(new FirstXamarinFormsApplication.App());
    }
}
Running the application now may result in an exception, stating that Xamarin.Forms should have been initialized. The initialization can be included in the OnLaunched event override method that can be found in the App.xaml.cs file.
Finally, we need to modify our view model so that it returns the correct information about the current runtime:
public string Platform
{
    get
    {
        if (Device.RuntimePlatform.Equals(Device.Android))
        {
            return "Android";
        }
        else if (Device.RuntimePlatform.Equals(Device.iOS))
        {
            return "iOS";
        }
        else if (Device.RuntimePlatform.Equals(Device.UWP))
        {
 return "Universal Windows Platform";
        }
        else
        {
            return "Unknown";
        }
    }
}
Now, running the application would display the same UI as on the previous platforms, but as a UWP application:
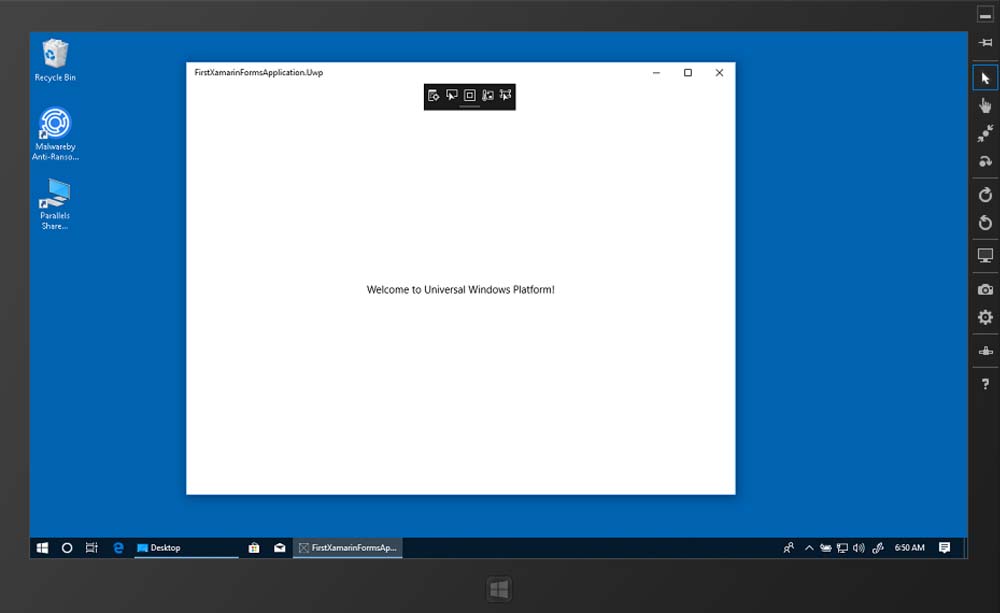
As you can see, with a minimal amount of platform code, we were able to include the Windows platform as one of the targets for our application. The same could have been done either using the Xamarin classic approach and only using the view-model, as well as by creating a native UI using the UWP toolset.
- 電影中的精神病學(xué)
- 郎景和院士“關(guān)愛(ài)女性健康”系列:婦科腫瘤的故事
- 母嬰護(hù)理員(月嫂)
- 角膜上皮細(xì)胞功能障礙診療圖解(眼表疾病臨床系列)
- 視覺(jué)康復(fù)指南
- 圖解針灸經(jīng)外奇穴速查手冊(cè)
- 中華口腔醫(yī)學(xué)會(huì)團(tuán)體標(biāo)準(zhǔn)(2017—2022年)
- 北京協(xié)和醫(yī)院肌電圖臨床應(yīng)用病例解析
- 顱內(nèi)血管疾病超聲圖解100例
- 牛津通識(shí)讀本:自閉癥(中文版)
- 臨床神經(jīng)認(rèn)知及社會(huì)功能評(píng)估手冊(cè)
- 急診分診指導(dǎo)手冊(cè)
- 新生兒聽(tīng)力篩查
- 腫瘤康復(fù)指南
- 臨床急癥介入治療學(xué)