- Microsoft 365 and SharePoint Online Cookbook
- Gaurav Mahajan;Sudeep Ghatak
- 562字
- 2021-04-02 20:25:23
Modifying the top navigation
When you create a new Communication site or register a site as a hub, SharePoint also creates a navigation menu toward the top of the site. You can use the Global Navigation menu to help your site's users quickly browse to different areas in your site.
In this recipe, we will learn how to modify the Global Navigation in a site in order to add a new header and sublink menu items.
Getting ready
You will need either the Edit, Design,or Full Controlpermission level in your site to be able to modify the Global Navigation. The site you will be modifying should either be a Communication site or designated hub site.
How to do it...
To change the Global Navigation in your site, follow these steps:
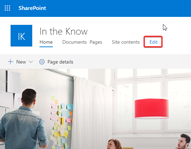
Browse to any page within the site.
Click the Editlink toward the end of the top navigation bar, as shown in the following screenshot:
This results in the Global Navigation opening up in Edit mode. Position the mouse cursor below an existing item where you would like to add the new menu item.
Click the + sign and then select the Header option from the Choose an option drop down, as shown in the following screenshot:
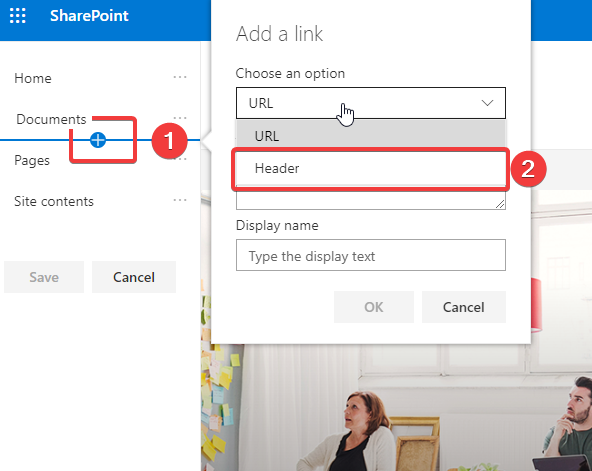
Give your menu a Display name and then click the OK button. This will result in a new Header being created.
To add a link underneath the newly created Header item, position the mouse cursor directly below it.
Click the + sign and then selectURLfrom theChoose an option drop down.
Enter values for the Address and Display name text boxes, as shown in the following screenshot:
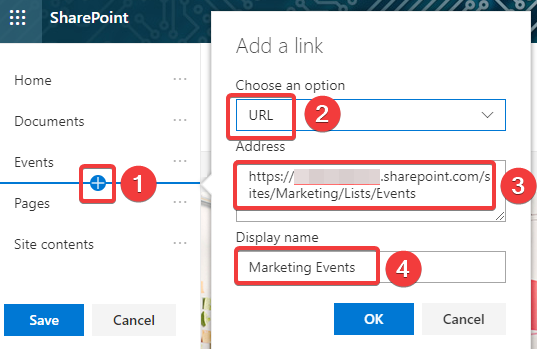
Click the OKbutton to save your URL.
Click the three dots next to your newly added link menu.
Click the Make sub link menu option, as shown in the following screenshot:
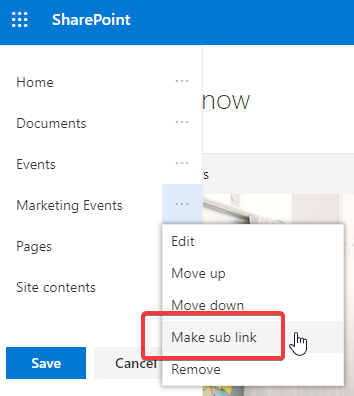
Then, click the Save button to save your changes.
Congratulations! You just added new navigation items to your Global Navigation.
How it works...
Communication and hub sites are typically used in communication or intranet type scenarios, where users are likely to be presented with content from across multiple pages and/or sites. Such sites are typically designed so that users can easily get to the content they are looking for. This is typically done through an enriched search experience. Even then, users typically start looking for content using the top navigation. Creating a robust cross-site Global Navigation in such scenarios aides the user experience by helping users quickly browse to the information they are specifically looking for.
There's more...
SharePoint lets you create the Global Navigation menu using two different widely accepted styles. We will discuss these here.
Cascading menu and Megamenu
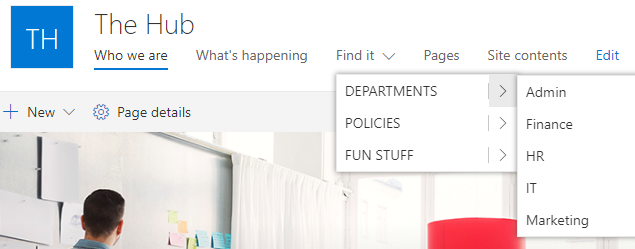
SharePoint lets Global Navigation to be styled as either Cascading menus or Mega menus. A cascading menu uses the classic multi-level navigation to help you display your navigation hierarchy using multiple sub-level menus, as shown in the following screenshot:
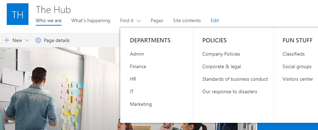
On the other hand, the Mega menuoption, which was recently introduced in SharePoint, lets you display multiple levels of navigation without you having to go through the various flyouts shown in the following screenshot:
You can switch between either of these menu styling options through the Change the look setting, which was described earlier as part of the Changing the look recipe.
See also...
The Audience targeting topic of the Adding a web part recipe, earlier in this chapter
- Getting Started with ResearchKit
- Learning Docker
- R語言數據可視化之美:專業圖表繪制指南
- Java Web開發之道
- Drupal 8 Configuration Management
- Modular Programming in Java 9
- Symfony2 Essentials
- Visual FoxPro程序設計習題集及實驗指導(第四版)
- Learning jQuery(Fourth Edition)
- Xamarin Blueprints
- Java程序設計教程
- 算法秘籍
- 軟件測試技術
- Joomla!Search Engine Optimization
- 一步一步學Spring Boot:微服務項目實戰(第2版)